XE303C12, top view
I got this ARM-based Chromebook for little money, so I thought I’d have a go with Linux on it. It is quite small and lightweight, almost like those Ultrabooks, but much cheaper, in every respect.
Installing Linux
TODO: Copying the old system, installing Debian, make Flash work TODO: my scripts
Convert SD to MicroSD card slot
Motivation
Linux works well on the Chromebook, but 16 GB of internal storage is a bit short. Luckily, the Samsung Chromebook has an SD card slot for expansion storage. I set up my Linux so that it puts all directories that are normally written to on the external SD card, effectively using the internal storage as a read-only memory.
Well, but due to space constraints or evil attempts on Samsung’s side to limit the usability of the SD card slot, a normal SD card protrudes by 2/3 of the card’s length from the Chromebook when inserted. :-/ The MacBook Air has the same issue, probably because of the similar reasons: Buy more internal, expensive storage instead of expanding it yourself… Some clever people came up with an MicroSD to SD adapter card that is so short, it is flush with the case when inserted. Well, but in the Chomebook, the card still protrudes from the curvesd bottom, although is doesn’t protrude from the side.
After all, the only feasible way to use an SD card without protrusion is to mount it inside the case, so let’s open the device.
Replacing the card slot
Remove all feet, unscrew all now visible screws from the bottom. Remove the rear bezel gently, then proceed with the bottom. Disconnect all connectors, especially the battery. Unscrew the four screws that hold the main board, remove it.
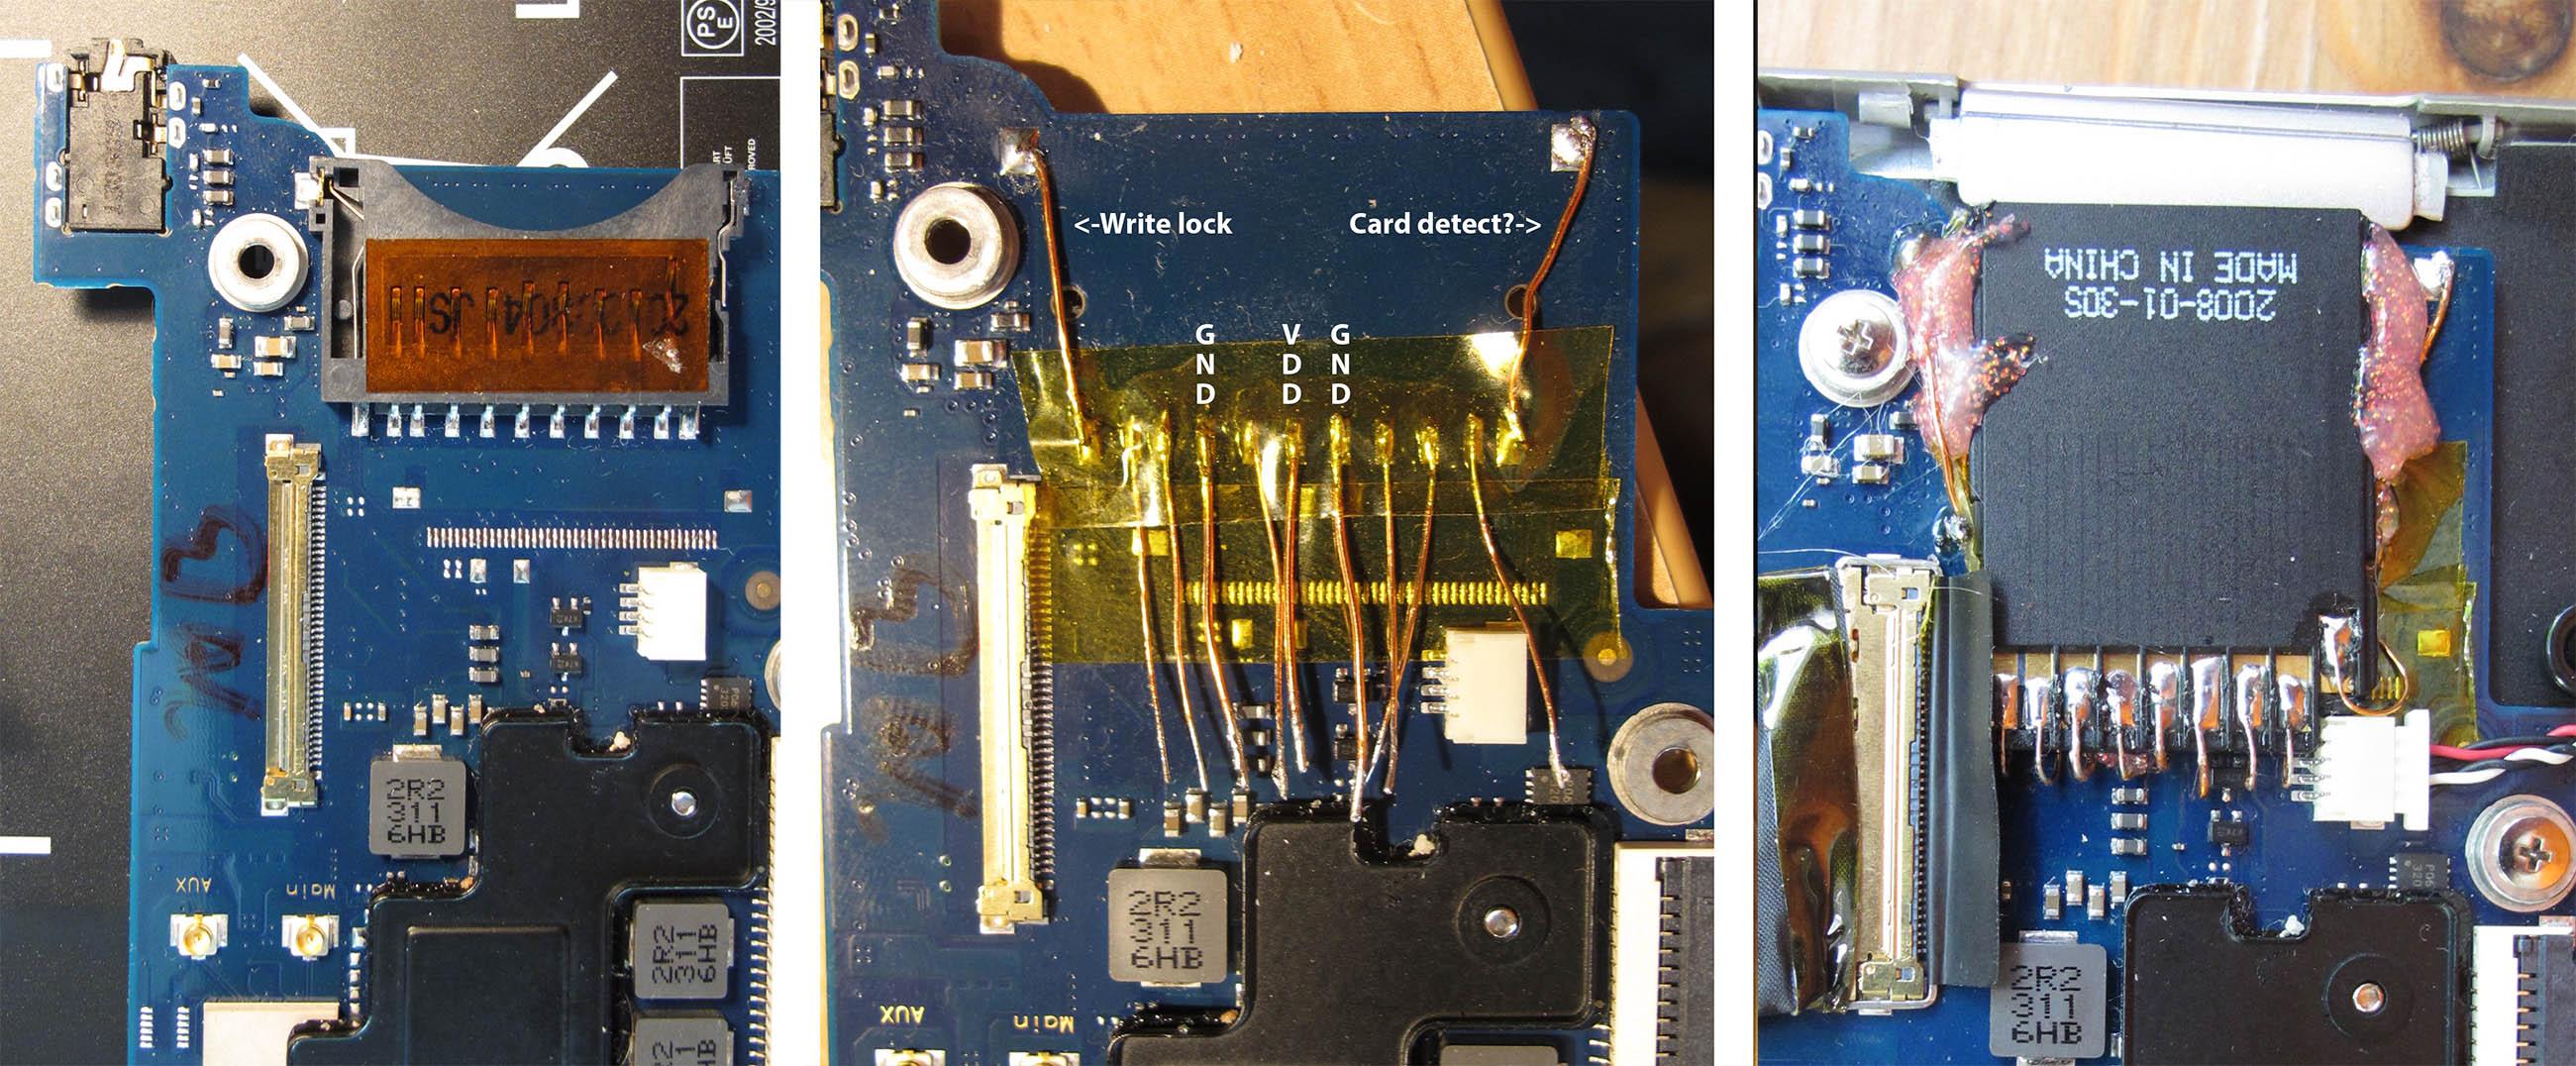
Exchanging the card slot
Now, let’s proceed with the card slot (left third of the picture). Unsolder the card slot, starting at the edge of the board with the large pads. A good soldering iron and a thin piece of steel to lift the pins individually from the pads is handy. Hot air also works if you preheat the PCB before, but I switched to my soldering iron because the PCB drew away the heat from the air gun too quickly.
After you successfully removed the card slot without damaging the solder pads, clean them and solder some small copper wires to them. I made the power lines (see middle part) of 0.5mm thick copper while the other wires had about 0.25 mm diameter. Take care to solder the large pads at the top edge to their corresponding pad at the bottom row: The left wire is the write lock, without it, you can’t write to your SD card. The right one may be unnecessary, but to be sure, just solder it. Put some Polyimide (“Kapton”) tape on the soldered pads to insulate them from and the traces below from hot glue or any other metal particles, just to be sure.
Close up of the new adapter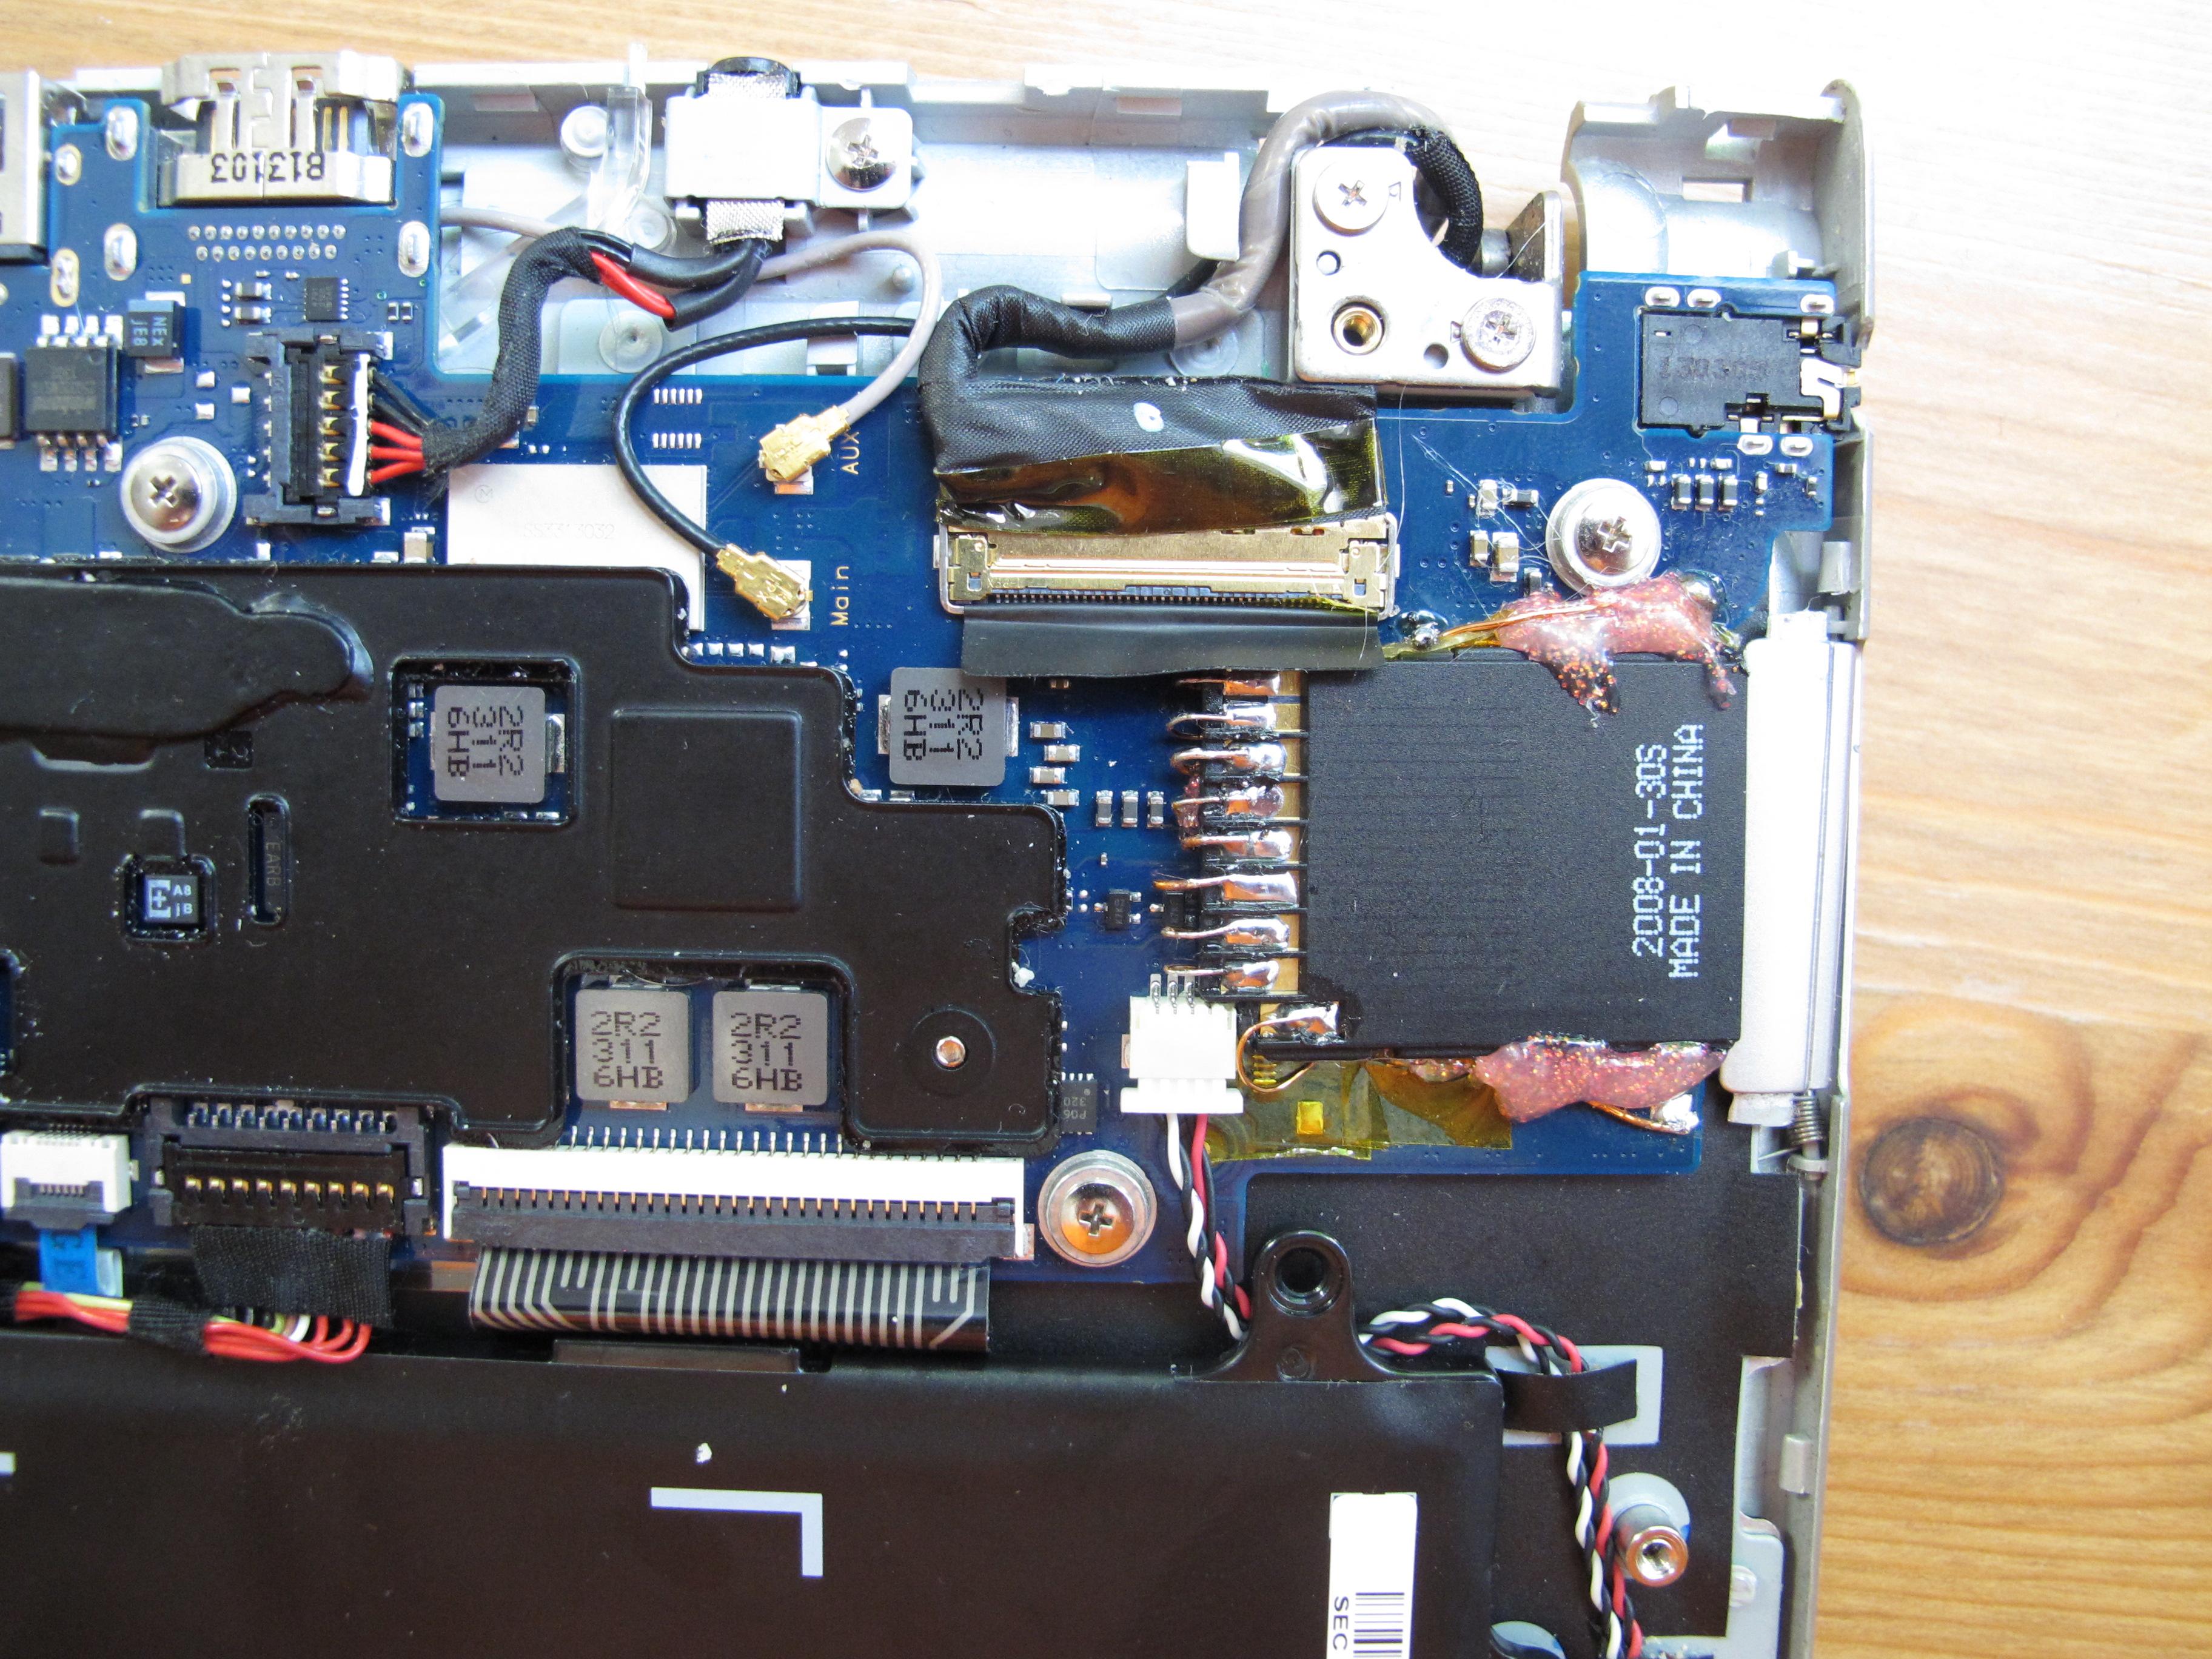
Finished board
Board with new adapter mounted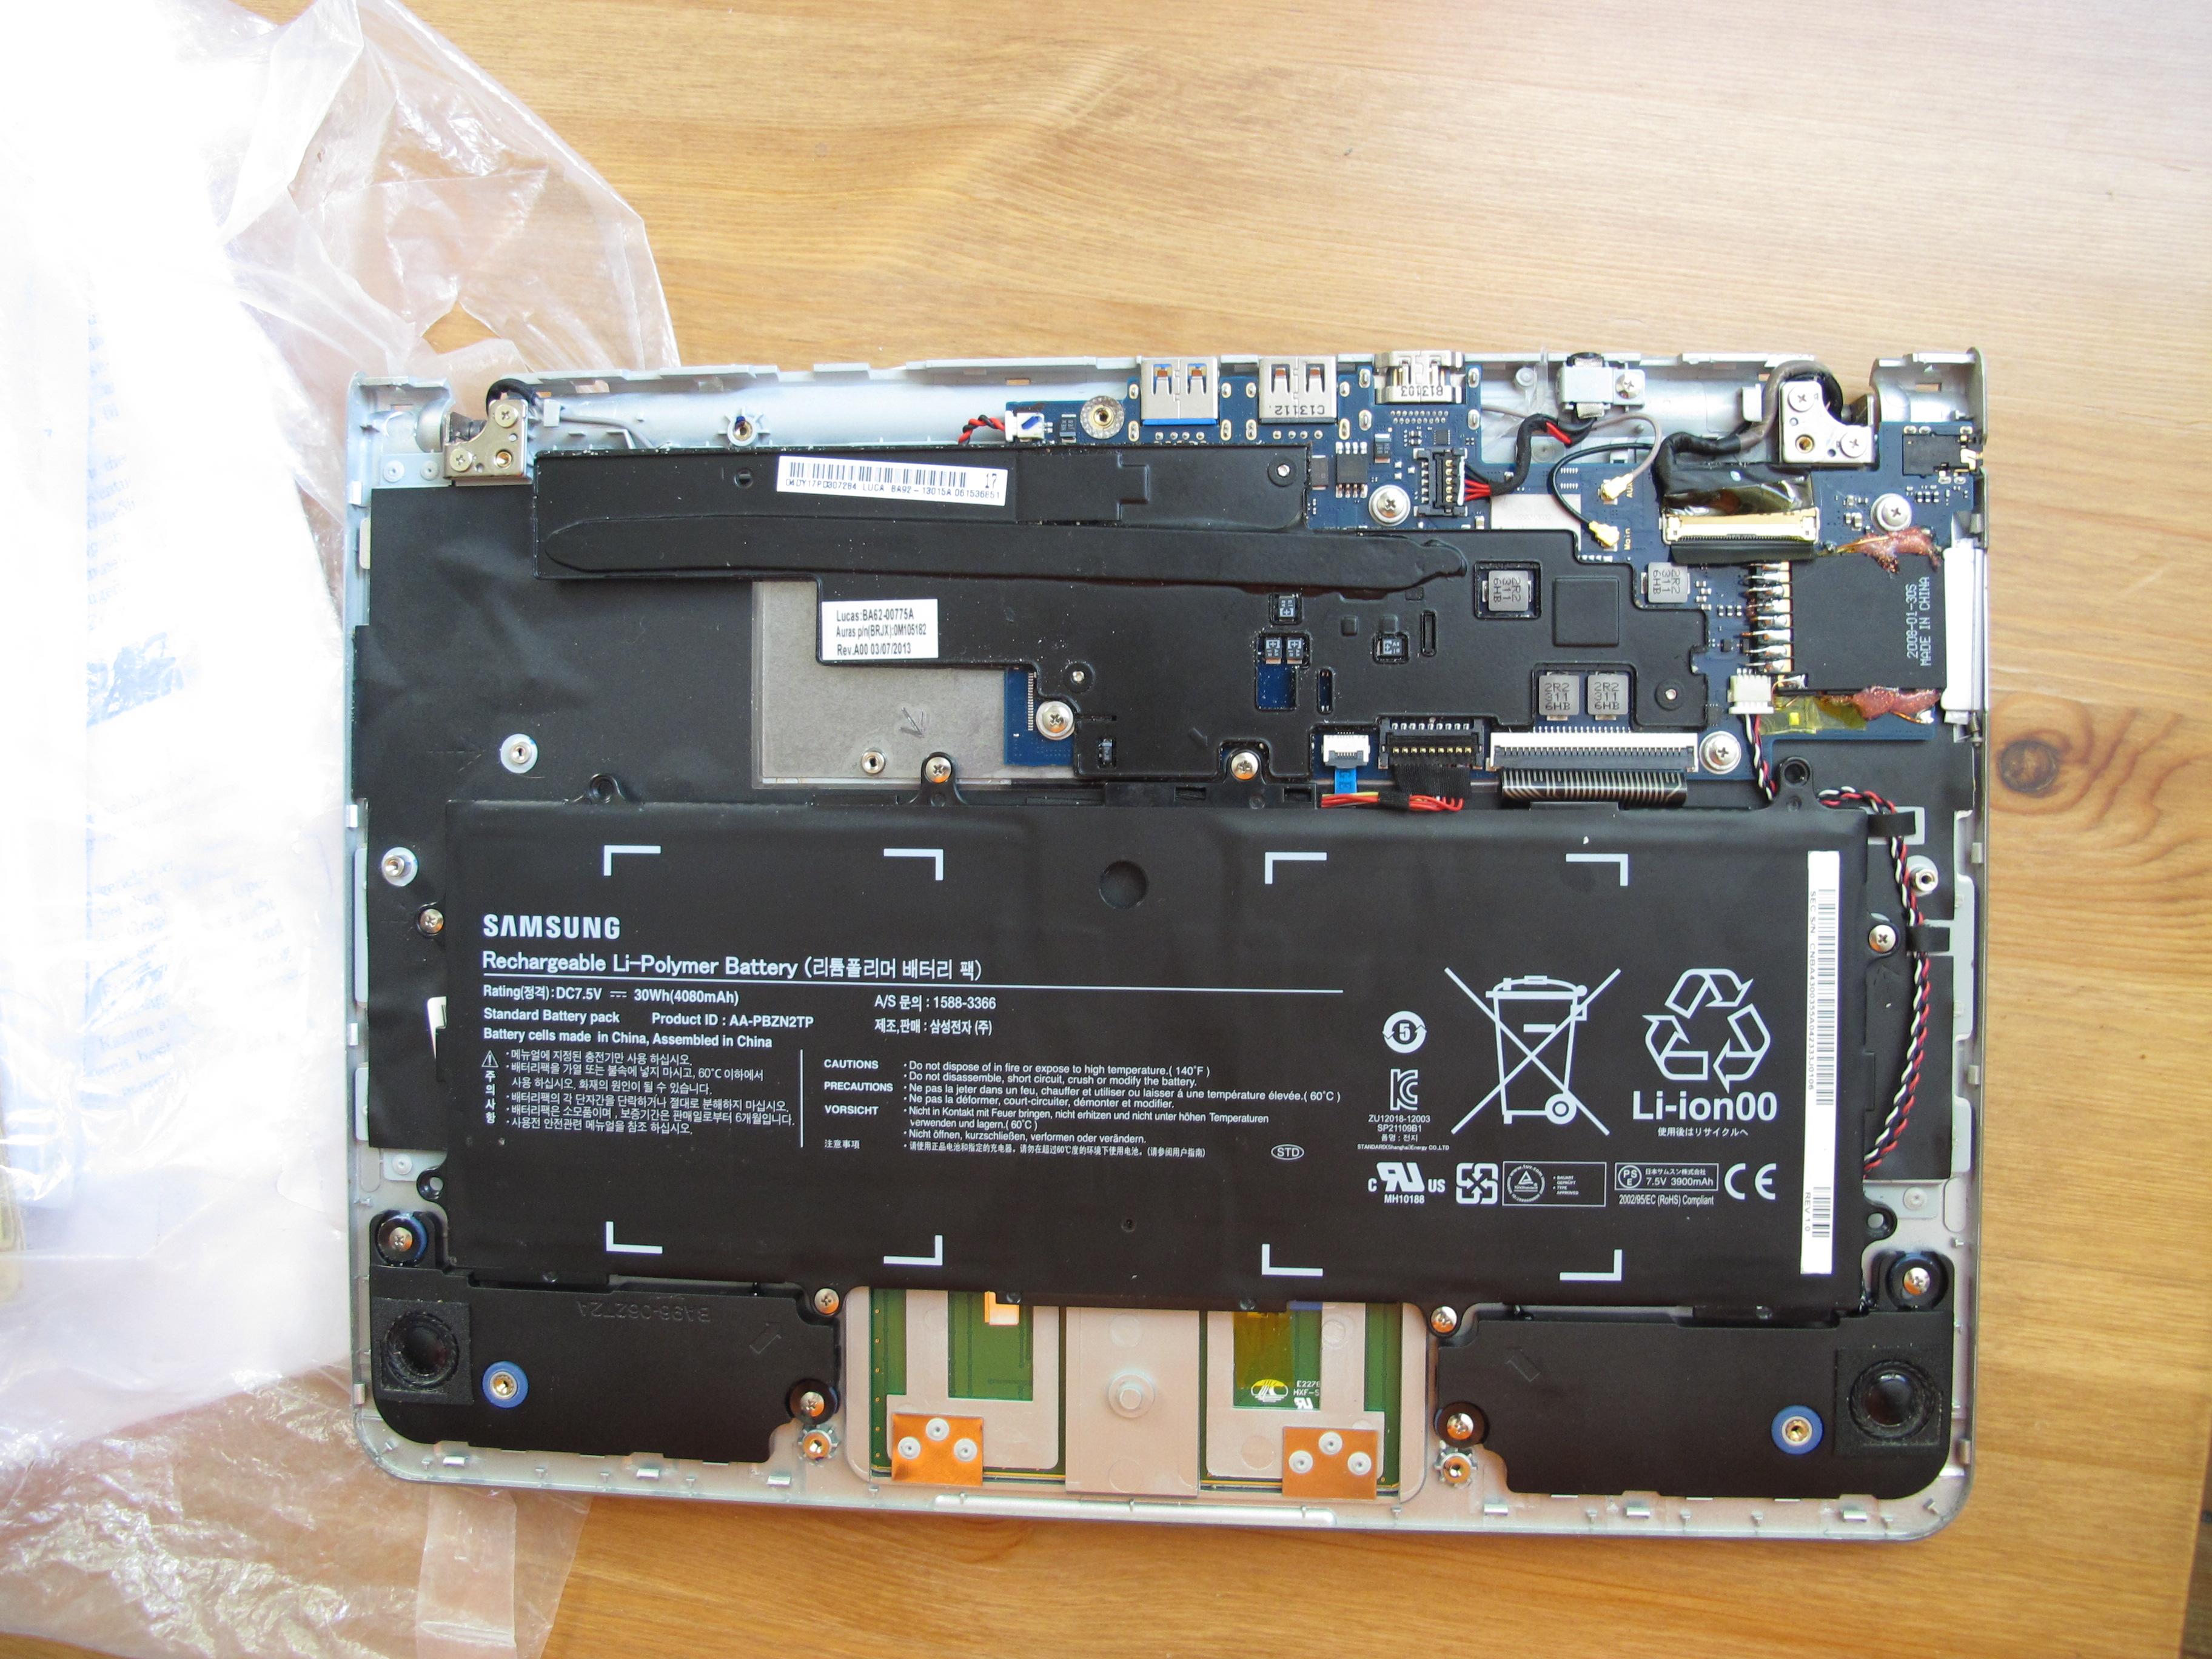
If you ever want to change the SD card, you have to pry it from the slot with tweezers, but hey. That’s a good compromise for having no protruding parts anymore on your Chromebook! :-)